Managing upload presets for developers
Last updated: Apr-23-2025
Upload presets enable you to centrally define a set of asset upload options instead of specifying them in each upload call. You can define multiple upload presets and apply different presets in different upload scenarios.
You can set your presets as signed or unsigned. Unsigned presets can be used with unsigned upload calls, such as uploading directly from the browser, in the upload widget or for Auto Upload settings.
Use cases
Some use cases for using upload presets include:
- Define how the assets will be stored and accessed, such as the way the public ID value will be determined (
use_filename), which folders they'll be stored in (asset_folder), and whether existing assets can be replaced by those uploaded with the preset (overwrite). - Generate eager transformations for uploaded files (
eager). This is especially valuable for video transformations that may take longer to generate and helps to ensure your uploaded files will be ready for delivery. - Apply incoming transformations while uploading a file (
transformation), for example to limit format types or file size before storing uploaded files in Cloudinary. - Apply add-on capabilities, such as auto-tagging (
categorization) or automatic moderation (moderation), to your uploads. - Update the behavior of user-generated content uploads without modifying your website or mobile app code.
- Set up default upload behavior for uploads via the Media Library or via upload method commands.
- Use as upload preferences for uploads via the Upload widget.
Creating and managing upload presets
You can create, modify, or delete upload presets using the Upload Preset tab in the Upload page of the Console Settings or programmatically using the upload_presets method of the Admin API.
- When defining an upload preset that may be used for both image and video uploads, you can include both image-specific and video-specific upload options (e.g., for moderation or tagging add-ons) and only the relevant options will be used when a file is uploaded with that preset.
Any upload options in your preset that apply to a different format are silently ignored. However, if you also supply incoming or eager transformations as part of an upload call, make sure that all the transformation parameters included in the call are relevant for both images and videos. - Whether you create your upload preset via the Cloudinary Console or programmatically, upload presets may also impact the behavior of uploads that are performed in the Media Library. For more information, see Managing upload presets in Assets.
- The options available for upload presets, both in the UI and the API, are different if your product environment is using legacy fixed folder mode. For details about the UI, see Folder modes - Upload preset options, and for details about the API, see Folder modes - Upload method.
- You can set up lazy migration with auto-upload using the Auto Upload Mapping tab in the Upload page of the Console settings to upload files only when first accessed. When adding a mapping, you need to specify a Target Folder and an associated Source URL Prefix. If a requested asset isn't found within the specified Target Folder, it’s retrieved from the specified Source URL prefix.
You can automatically apply a set of upload settings to assets uploaded via an upload mapping by associating the mapping with an upload preset. To do this, name the upload preset the same as the upload mapping’s Target Folder.
Managing upload presets using the settings UI
To create or modify an upload preset using the Upload Preset UI, navigate to the Upload Presets page of the Console Settings.
- To create a new upload preset, click Add Upload Preset.
- To modify an existing preset, select Edit from the preset's (3-dots) option menu.
- To base a new upload preset on an existing one, select Duplicate from the (3-dots) option menu for the desired upload preset. The duplicate will appear at the top of the list with a random name. You can then select Edit to rename it and adjust the settings as needed.
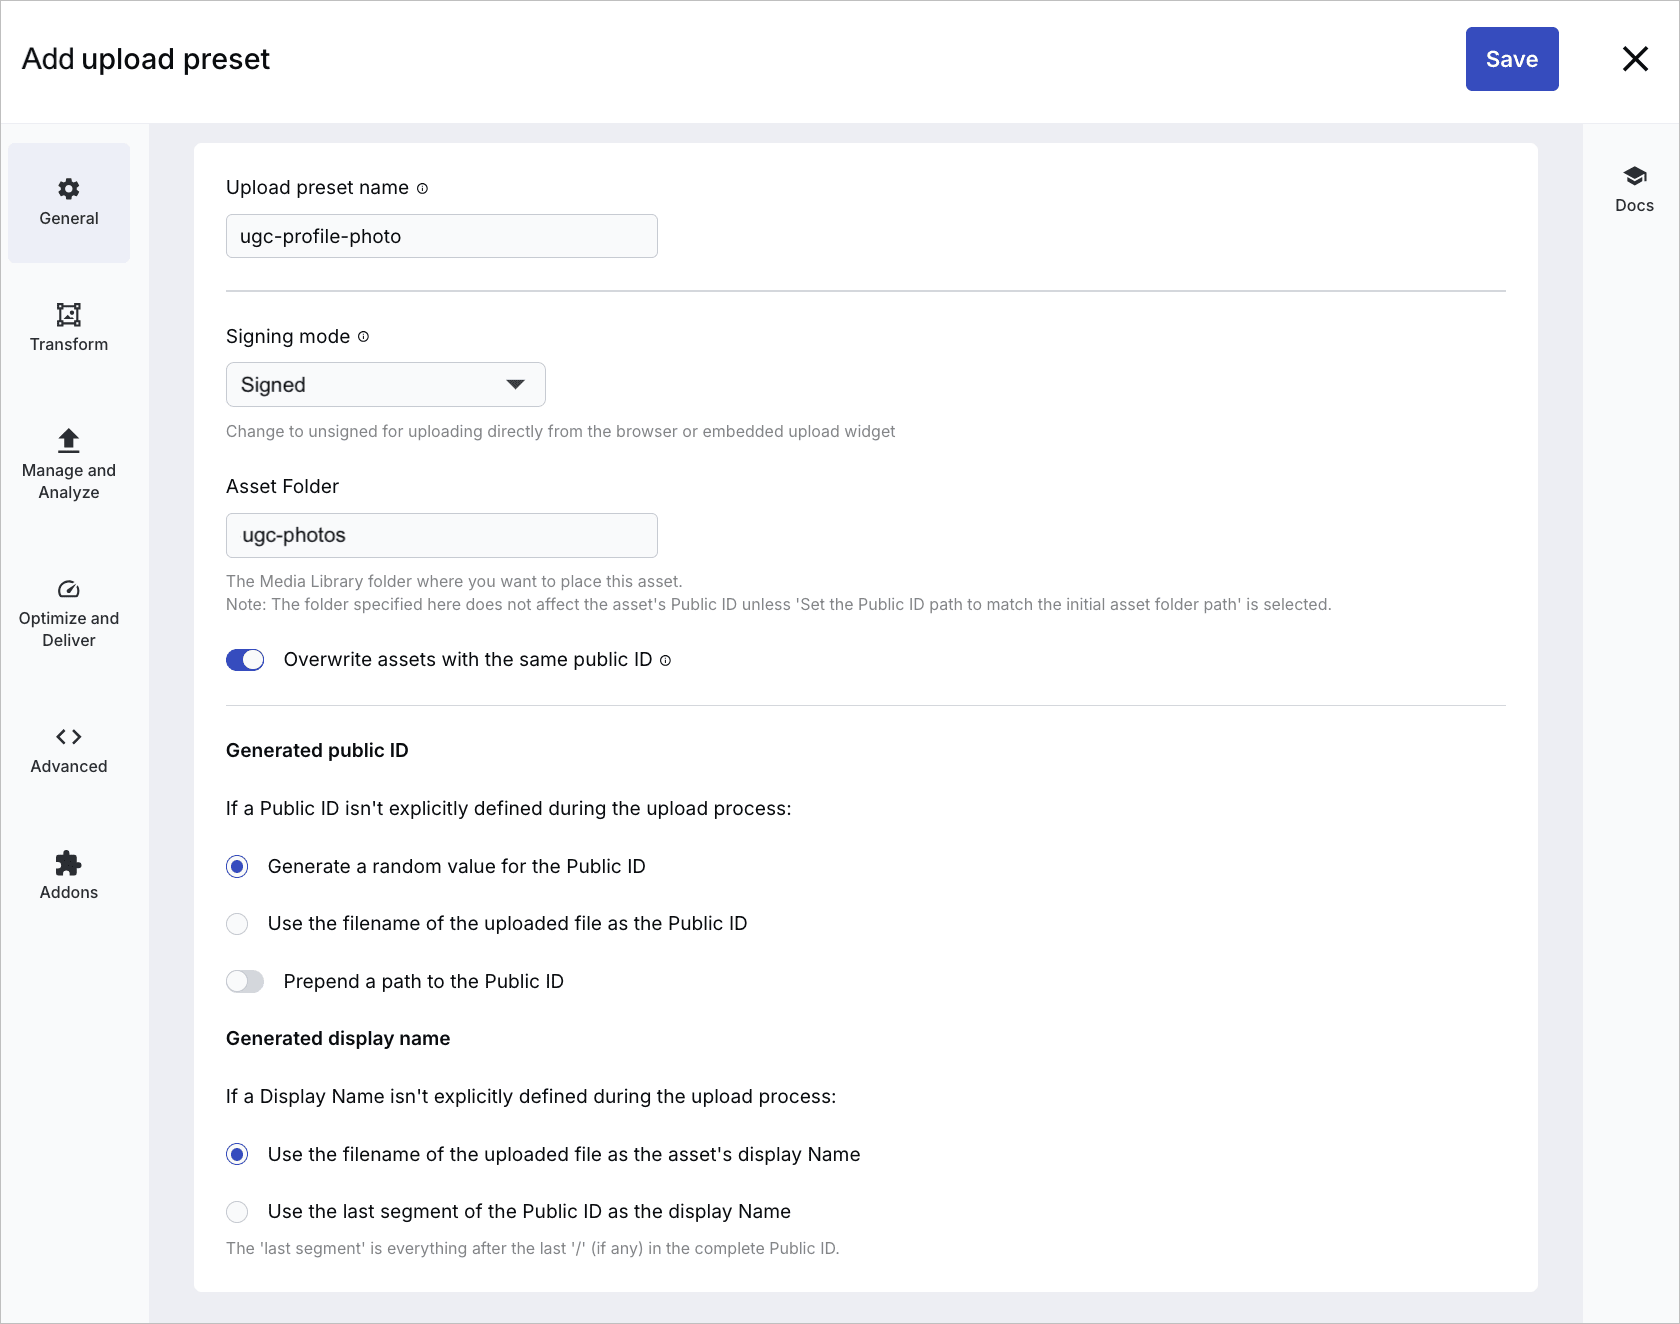
The upload preset page includes several sections where you can set a variety of upload options.
The most important thing to consider when creating a new upload preset is whether you want the upload preset to be signed or unsigned. For example, only signed presets can be used as the default upload preset for the Upload API or Media Library or if you are implementing signed uploads for your application. Conversely, in most cases, you will need to use unsigned upload presets when implementing unsigned upload capabilities from your client-side app or when using the upload widget within a client-side app.
In general, the options in the Upload Preset interface parallel the parameters you can set in an upload method command. However, there are some options that may be available only programmatically. Those that are unavailable usually relate to specific sub-options of some of the add-ons or those related to complex transformation options, which might be relevant if you are defining eager or incoming transformations for your upload preset.
The options relating to asset naming and folders differ depending on whether your product environment uses dynamic or fixed folder mode. For more information, see Naming, storage and folder mode options.
When you finish and Save your upload preset definition, the upload preset and its settings are displayed in the Upload Presets page of the Console Settings:
Managing upload presets programmatically
You can use the upload_preset method of the Admin API to create, manage, or delete upload presets, either via a REST API call, any of our backend SDKs. If you don't have a server-side application, you can manage upload presets programmatically using the Cloudinary CLI. For the most part, you can apply the same set of options for an upload preset as you can in an Upload method call.
For example, the following code creates a new unsigned upload preset called my_preset, requests automatic-tagging using the Google tagging add-on engines for both images and videos, removes the backgrounds for images, and uploads to a folder called new-products:
You can similarly use the Admin API to list, modify or delete existing upload presets. For complete details, see the upload_preset method in the Admin API Reference.
Upload preset video tutorial
This video tutorial walks you through the steps of creating signed upload presets using the Admin API.
This video is brought to you by Cloudinary's video player - embed your own!
Tutorial contents
Naming, storage, and folder mode options
You may want to pay special attention to the following options that impact how your assets are named and stored. Some of these options differ between dynamic and fixed folder mode.
Set them either from the settings UI, or programmatically using the upload_presets endpoint of the Admin API. You can find the specific parameters that implement these options in the Upload method call.
| Option | Dynamic Folder Mode | Fixed Folder Mode |
|---|---|---|
| Public ID naming preferences | By default, the public ID is randomly generated to ensure uniqueness. However, to improve SEO, you can set the public ID to match the file name of the asset you're uploading (use_filename:true) with or without an added random suffix (unique_filename:true/false). |
These options are the same for fixed folder mode. |
| Destination folder and URL path |
You can specify an use_asset_folder_as_public_id_prefix:true), or you can separately specify a custom prefix to prepend the public ID (public_id_prefix). However, even when one of these options are set, if the asset is later moved to a different asset folder, the public ID path doesn't change. |
You can specify a destination folder, which automatically defines both the URL path to prepend to the public ID and the folder where the asset is stored. If the asset is later moved to a different folder, the URL path updates accordingly and could cause delivery URLs to break in production. |
| Display names | The upload preset provides options for setting naming preferences for display names, including using the uploaded asset's file name (use_filename_as_display_name:true) or matching the display name to the last segment of the public ID (use_filename_as_display_name:false). |
There are no display names in fixed folder mode. |
Upload preset precedence
In situations where an upload preset is used, and parameters are also passed in the upload request, the following precedence rules are followed in the case that a parameter is passed in the request and in the preset:
For signed uploads: parameters given with the method request take precedence over upload preset parameters.
For unsigned uploads:
-
folderandtagsparameters in the upload preset take precedence. - The rest of the supported upload parameters take precedence over the upload preset parameters (the same as with signed).
Default upload presets
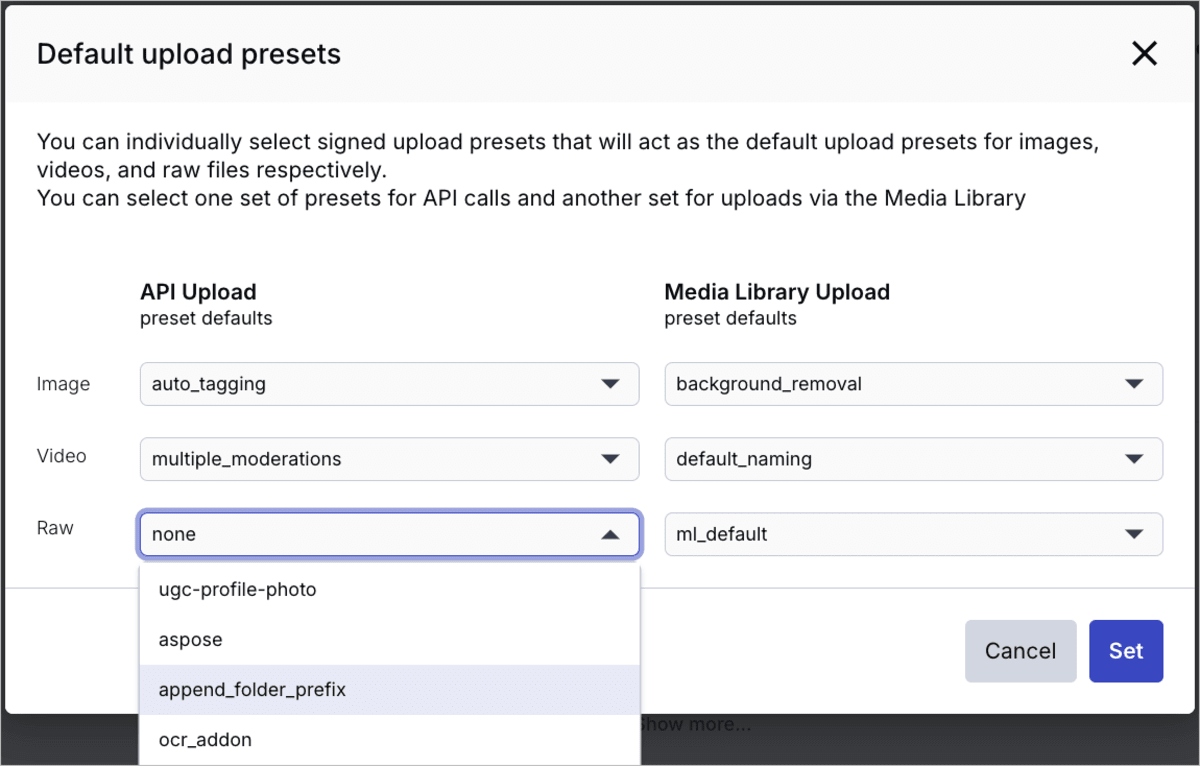
From the Upload page of the Console Settings, you can also individually select signed upload presets that will act as the default upload presets for images, videos, and raw files respectively. You can select one set of presets for API calls and another set of default presets for uploads via the Media Library.
The settings in these default presets are applied to all uploads of the relevant asset type whenever no other upload preset is specified directly in an upload call, in your Upload widget code, or via the Advanced options of the upload widget in the Media Library.
The default Media Library presets apply to any assets that are dragged to a folder using the Media Library UI in your Console. They are also used by default when you select files from any source via the built-in Upload Widget in the Media Library.
However, if enabled for your account, then you can optionally select a different signed upload preset to use just for that upload in the Advanced options of the Media Library Upload Widget. For details, see Media Library Upload Widget.


