Adobe Creative Cloud Connector
Last updated: Apr-23-2025
- Overview
- Cloudinary Creative Cloud Connector video tutorial
- Installation and setup
- Connector options
- Opening Adobe files and inserting images from Cloudinary
- Uploading documents to Cloudinary
- Application-specific guidelines
- Commonly used Media Library features
- Cloudinary Professional Services configuration support
Overview
Th Adobe Cloudinary Creative Cloud Connector enables graphic designers to get graphic elements from Cloudinary and store their finished works in Cloudinary directly from Adobe InDesign, Illustrator, and Photoshop. The Connector brings essentially all Cloudinary Media Library functionality into the designers' work environment, ensuring that everyone is working with the same files and processes while maximizing efficiency for the designers by embedding these options into their regular workflow.
Many of the integration options are the same or quite similar between the three Adobe applications, but there are some differences. These differences are noted in the relevant sections below.
For example, InDesign offers additional functionality including live linkage between the images placed in your InDesign document and the originals stored in Cloudinary. This means that you are notified whenever a Cloudinary image you've used in your InDesign document has been updated in Cloudinary to a newer version.
Cloudinary Creative Cloud Connector video tutorial
This video demonstrates how to set up the Connector and insert files from Cloudinary for editing.
Tutorial contents
Installation and setup
The Cloudinary Creative Cloud Connector installation enables you to access the Cloudinary connector from within Adobe InDesign, Illustrator and Photoshop. It also adds a Cloudinary menu to the InDesign menu bar.
To install the connector:
- Make sure you are logged into Adobe Creative Cloud.
- Close all Adobe Creative Cloud applications.
- Run the Windows or Mac installation file you received from your sales or support contact and follow the on-screen instructions.
- When you open InDesign for the first time after installing the Connector, you'll be prompted to enter your Cloudinary Creative Cloud License Key. Enter the key you received from Cloudinary support to activate the fully enabled version of the Cloudinary Connector.
- If you didn't have the Cloudinary Creative Cloud license key for InDesign when you initially performed the above instructions, you can apply the license key later by selecting Cloudinary > Activate from the InDesign menu.
- For Apple Macintosh M1/M2 systems ("Apple Silicon"), the Adobe InDesign and Illustrator plug-ins/extensions now include native M1/M2 support. However, you must configure Adobe Photoshop to Open using Rosetta.
- If you update InDesign, Illustrator, or Photoshop to a new major version (for example, from CC2021 to CC2023), you'll need to re-install your Cloudinary Adobe Connector.
To connect your Creative Cloud application to Cloudinary:
-
Open InDesign, Illustrator or Photoshop and select Windows > Extensions > Cloudinary Creative Cloud Connector.
(From InDesign, you can also open it from Cloudinary > Cloudinary Panel.)
-
In the Connector welcome window, click Next. A browser window opens and prompts you to log in to Cloudinary.
In that login window, you must first check the box indicating that you authorize your Adobe application to access your Cloudinary account.After you successfully log in to Cloudinary, you can close the login browser tab and return to your Adobe application.
NoteSSO sign in is also supported, but requires an additional setup. If you would like to implement this option, please contact us. -
The Connector pane in your Adobe app prompts you to enter the cloud name of your product environment.
You can find your Cloud name near the top of the Cloudinary Console Dashboard.
After you connect to your cloud, the Connector pane displays your product environment's Media Library.
You can now start using the connector with this Adobe application. However, before you start, you may want to take a look at the available connector options or modify some of the default Connector preferences, as described below.
Connector options
You access the Cloudinary connector options from the options icon at the top right of the connector pane.
| Option | Description |
|---|---|
| Upload | Uploads the active document to your Cloudinary product environment according to the options defined in the Connector preferences and/or those defined in your default Media Library upload preset. |
| Preferences | Opens the connector Preferences. |
| Change Cloud | If your Cloudinary email address is associated with more than one product environment, use this option to switch between product environments without logging out. |
| Logout | If you want to log in with a different Cloudinary email address, use this option to log out of the current one. |
Cloudinary connector preferences
The Connector Preferences includes options for how images are uploaded and how they're opened or placed in your existing document.
When you set or update options in the preferences, they apply to all future uploads in that Adobe application (until you change the options again). However, the preferences are separate for each supported Adobe application.
Upload preferences
The Upload section of the Preferences dialog box includes the following options:
-
Folder: The full folder path where you want uploaded images to be stored, in the format
folder1/folder2. If a specified folder doesn't exist, it's created when your image is uploaded.ImportantMake sure you have edit permissions to the folder you specify. Otherwise, your uploads will fail. Tags: Tags that you want to apply to uploaded images. If your image overwrites an existing image, the specified tags replace any tags that image already had.
-
Upload preset (signed): A signed upload preset to apply to all uploaded images. Upload presets enable you to define a large variety of upload options. Upload presets are defined by Cloudinary administrators in the Upload Settings page of the Cloudinary Console.
- If you don't define an upload preset, then the settings in your product environment's default image upload preset are used. This preset is defined by a Cloudinary administrator in the Upload Settings of the Cloudinary Console.
- If you define a Folder or Tags in the Preferences and also in a specified upload preset or in your product environment's default upload preset, the values you provide in the connector Preferences override any that may be defined in the upload preset.
-
Make sure that the upload preset you will use (either the one you specify in the Preferences or your product environment's default API preset) has the appropriate settings for your needs. Specifically, in most cases when uploading from an Adobe CC application, the preset should have at least the following options set:
- Use filename of the uploaded file as the Public ID: On
- Append a unique suffix: Off
- Overwrite: On
NoteIf your product environment uses the legacy fixed folder mode, the above upload preset options are available with slightly different names.These settings ensure that the files you upload will have the same name as the files in your Adobe application, and that you will be able to overwrite the files in Cloudinary when you want to upload updates of your files.
You may also want additional settings in your preset. For example, you may want an automatic tagging add-on enabled. These decisions should be made together with your Cloudinary administrator.
For more details, see Managing upload presets in Assets.
Placement preferences
The options for image placement vary slightly from application to application. Details for these are covered in Application-specific guidelines.
Opening Adobe files and inserting images from Cloudinary
From the Cloudinary connector pane you can open or place Adobe files and images from your Cloudinary product environment.
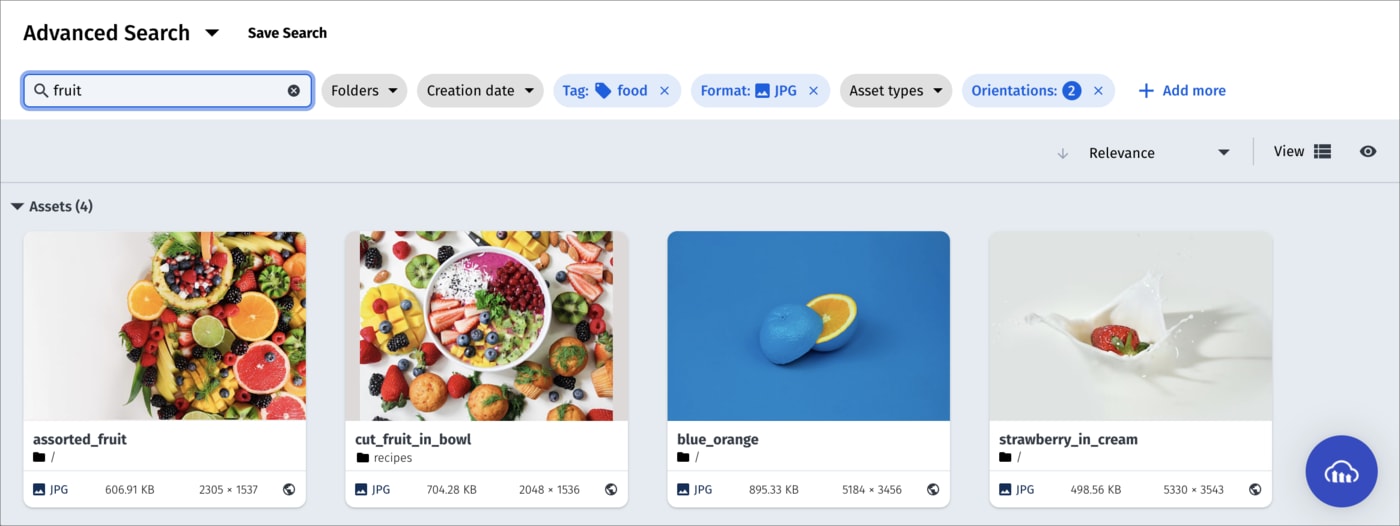
The connector gives you direct access to Media Library functionality. For example, to find the asset you want to insert, you could navigate to a collection containing the assets for your project or you could search for assets that fit your needs using the advanced search.
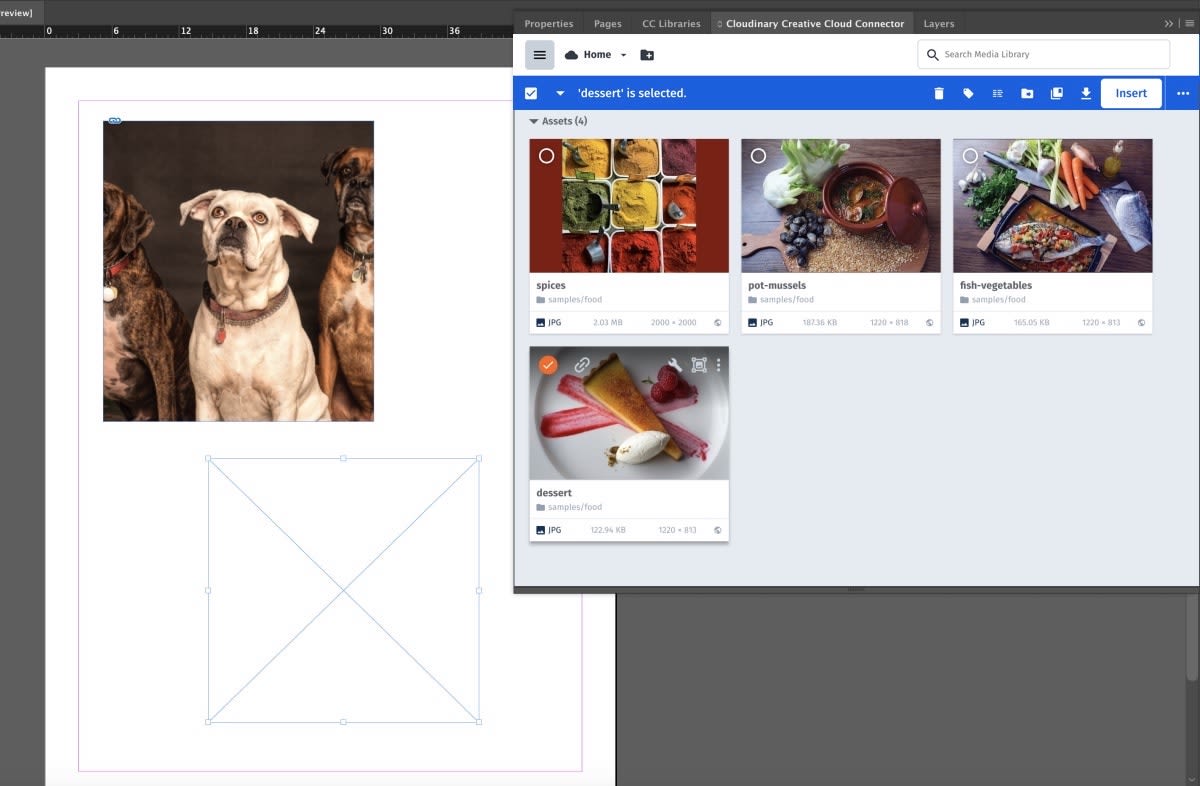
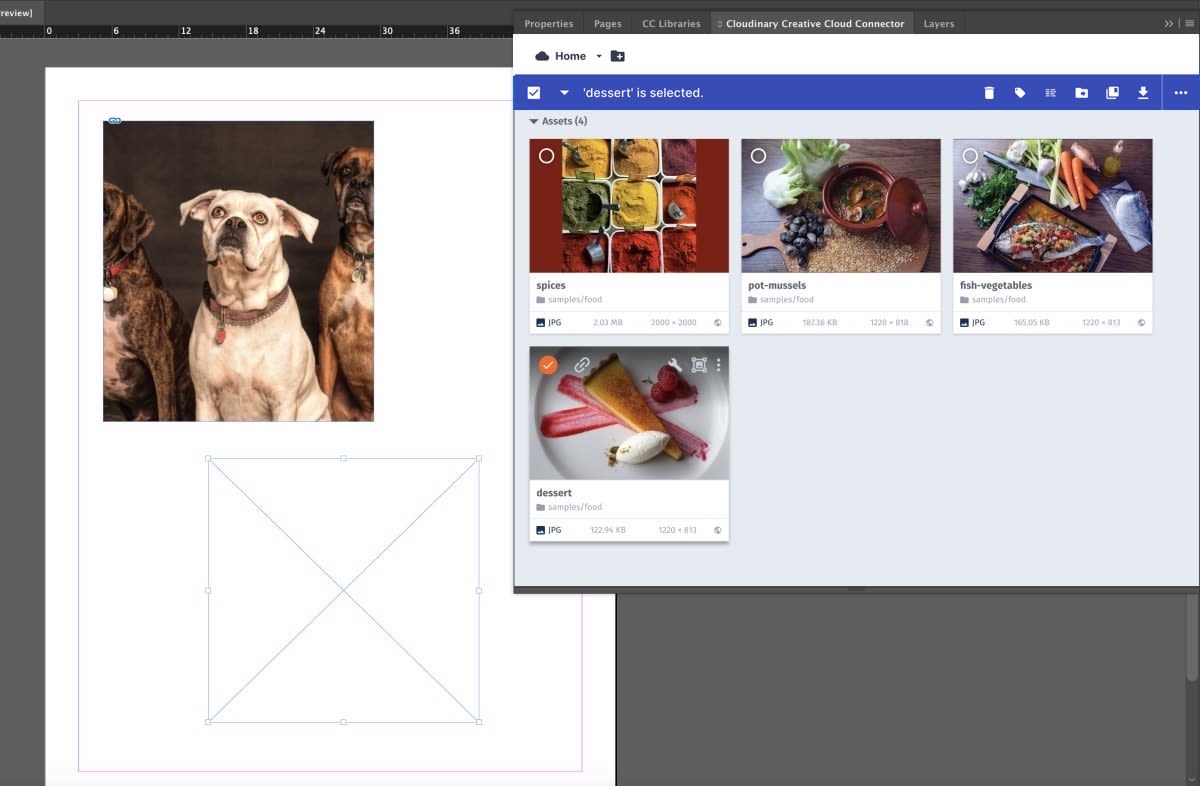
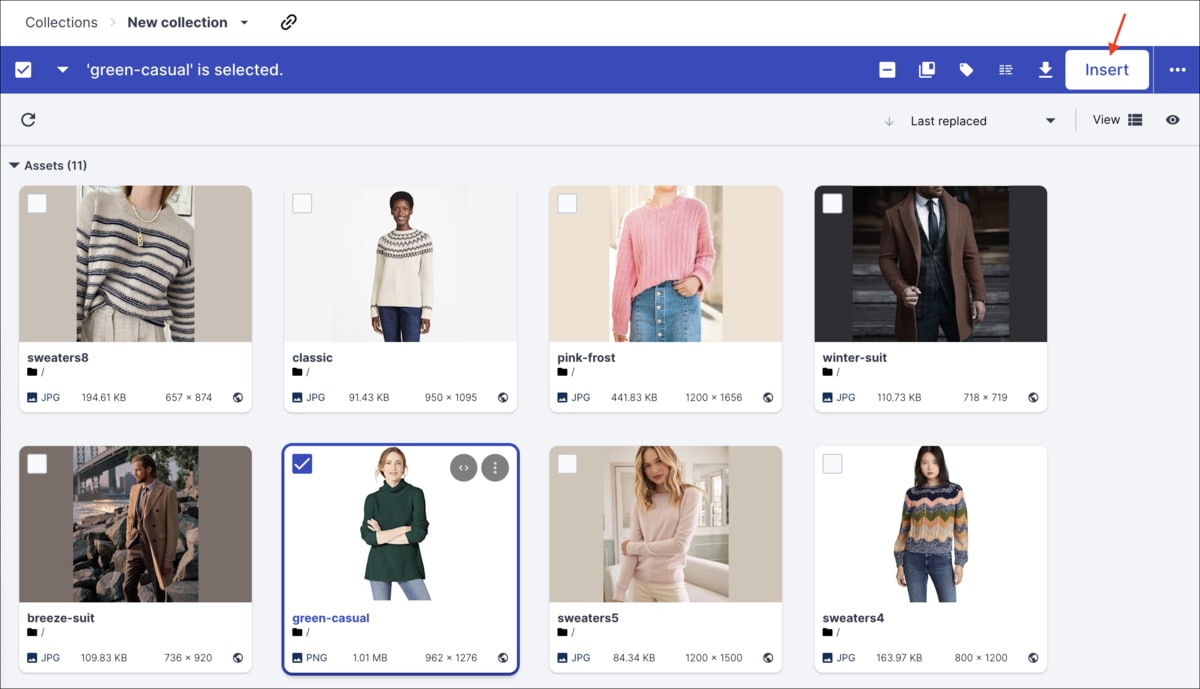
When you find the asset(s) that you want to insert, click the thumbnail checkbox and click the Insert button. (The check box may be next to or on the thumbnail, depending on the width of your Connector pane.)
Depending on the placement preferences you set in the Connector Preferences, the Adobe files or image(s) you selected may be opened in a new document, added to the current layer of your active document, etc. These preferences vary slightly between the three Adobe applications and are described in Application-specific guidelines.
Uploading documents to Cloudinary
When you've completed your work on an Adobe document, you can upload the active document to Cloudinary so that it will be available to the rest of your organization.
- Save the active document. If the document isn't saved when you select to upload, the upload will fail.
- Make sure you've set the correct upload preferences for the file you are uploading, including the folder where you want to upload it, and any tags you want to assign to that image.
If you want to update an existing file in Cloudinary with your current document, make sure:- Your Connector upload preferences are set to upload to the Cloudinary folder where the original image is stored
- Your product environment default upload preset or the preset you specify in the Connector upload preferences is defined with the recommended upload preset settings.
- From the Connector menu, select Upload from the Connector options.

Within a few seconds, the connector displays a confirmation message indicating the document was uploaded to Cloudinary and you can view it within the Connector Media Library by navigating to the folder where you uploaded it.
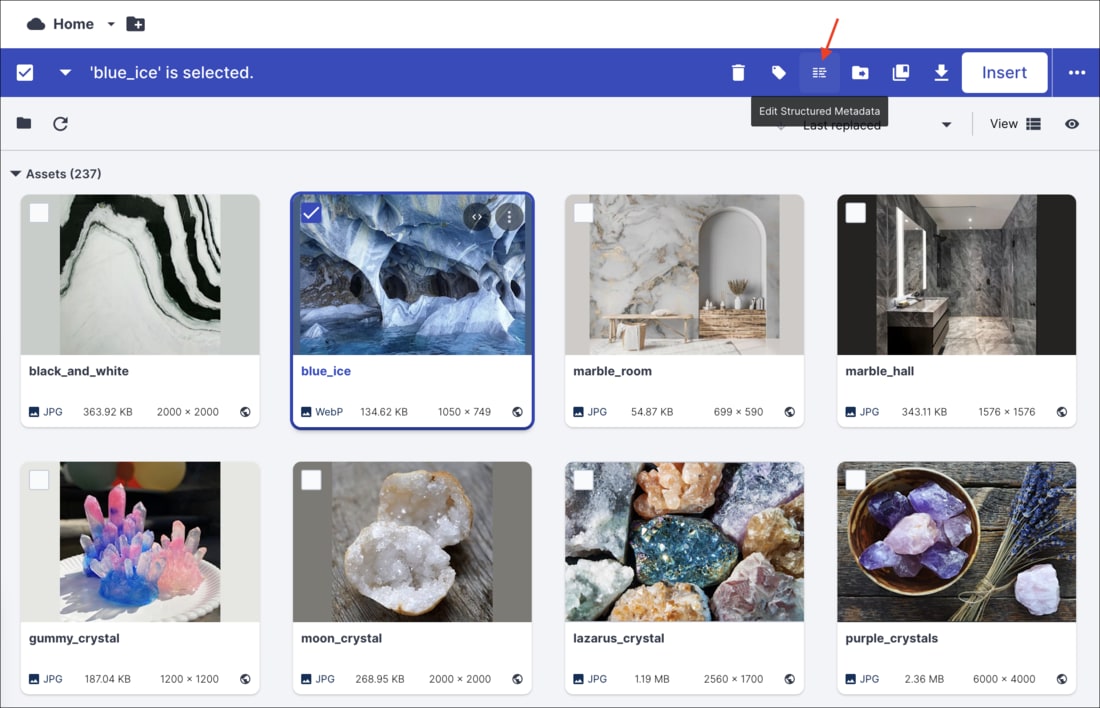
After uploading your file, you can take advantage of a variety of Media Library functionality. For example, you might want to add a newly uploaded image to an existing collection or edit its custom metadata by clicking the checkbox on your new asset, and selecting the relevant option from the toolbar.
Application-specific guidelines
This section describes the Cloudinary connector functionality for the following integrations:
InDesign integration
In addition to the functionality already described on this page, Cloudinary provides some additional capabilities for Adobe InDesign:
- Linked asset information
- Selecting the resolution for Cloudinary images
- Updating linked images
- Cloudinary menu
- InDesign placement options
Linked asset information
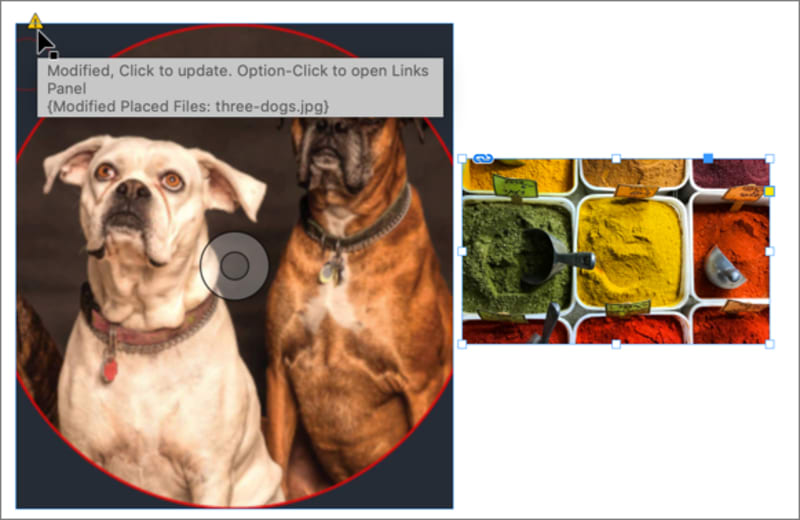
You can view the Cloudinary linked files along with any other linked files you've placed in your InDesign document by selecting Window > Links.
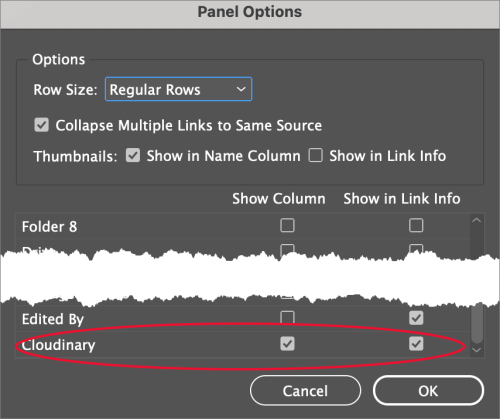
When you select a Cloudinary file, you can view the same kind of Linked info details that other linked files display, as well as the link status and displayed resolution. If you have linked objects in your document other than Cloudinary images, you can also choose to sort the files in the Links pane with Cloudinary images grouped at the top or bottom of the list.
Selecting the resolution for Cloudinary images
From the Links pane, you can also select to switch any linked Cloudinary image between low and high resolution display by clicking the resolution icon under the Cloudinary column in the pane.
For example, you may want to choose low resolution while working and then switch to high resolution before publishing. In the above Link pane image, you can see that the three-dogs image is set at low-res, while the spices image is set at high-res.
You can toggle the resolution for all Cloudinary assets in your document by pressing Alt + Double-click (Option + Double-click on Macs).
Updating linked images
When you insert images from Cloudinary into your InDesign document, they're placed as linked artwork. This means that if those images are updated in Cloudinary, you will be notified within InDesign that your linked item has changed, and you can double-click to update it.
Cloudinary menu
The Cloudinary connector adds a Cloudinary menu item to your InDesign menu bar. From this menu, you can open the Cloudinary Connector panel. (You can also open the panel from the Window > Extensions menu as described in Installation and setup).
InDesign placement options
Replace selection on place: If a frame is selected when you select to insert a Cloudinary image, the image is automatically placed in the selected frame and replaces any image that may have previously been placed in that frame.
Show Import Options: Opens the Import Options dialog box where you can select from additional options before placing the image.
Illustrator integration
Illustrator placement options
-
Open in Illustrator: Opens the selected image as a separate AI document.
- If you choose to insert an Illustrator (.ai) file from the Cloudinary Media Library, it opens as a new document and is saved on your computer in a temporary local file location. This enables you to edit existing Illustrator documents, save locally while working, and then re-upload the updated version to Cloudinary as described in Uploading documents to Cloudinary.
- If you select an image other than an AI file, the image is inserted within a new AI document. The size of the new document is based on the most recently created new AI document (as shown under 'Recent items' in the AI new document dialog box).
-
Add layer to Illustrator: Adds the selected image as a new layer in the active AI document.
NoteOnce inserted as a layer, the image layer isn't linked to Cloudinary and won't be updated in your Photoshop document if the image that's stored in Cloudinary changes.
Photoshop integration
Photoshop placement options
Open in Photoshop: Opens each selected image as a separate Photoshop document. If you select to open a PSD file, the image opens with all layers, just as it was saved and uploaded. The file is saved on your computer in a temporary local file location. This enables you to edit existing images, save locally while working, and then re-upload the updated version to Cloudinary as described in Uploading documents to Cloudinary.
-
Add layer to Photoshop: Adds each selected image as a new layer in your active document. Even if you select to add a PSD file as a layer, the entire image is inserted as a single (merged) layer.
NoteOnce inserted as a layer, the image layer isn't linked to Cloudinary and won't be updated in your Photoshop document if the image that's stored in Cloudinary changes.
Commonly used Media Library features
The Cloudinary Creative Cloud Connector embeds a compact version of the Cloudinary Media Library in your Adobe application. From the Connector, you can access almost all of the same functionality that's available in the full Media Library in your Console.
Advanced Search
The Advanced Search feature lets you search by filters such as tags, metadata, format, orientation, resolution, or (if supported for your account), even by image analysis characteristics, such as prominent colors, presence of faces, or image location.
For more details, see Advanced Search in the Assets user guide.
Collections
Collections are ad-hoc groupings of assets. Assets can be added to and from collections without affecting or moving the asset itself, and assets can be included in multiple collections. You can create your own collections (assuming you have the required permissions) or other Cloudinary users can share collections with you. You can also share collections with external stakeholders by sending a URL to a dedicated collection webpage, which is available to those with a link during an optionally specified date range.
Collections can often be a convenient way to group all assets that you might want to use on a particular project or campaign.
For more details, see Collection management in the Assets user guide.
Tagging and metadata
Assets that have tags and other metadata enable all Media Library users to better organize and search for assets in the Media Library.
In addition to the option to specify tags when you upload an image, you can also add or edit tags and other metadata after images are uploaded via the embedded Media Library, and even set the same tags or metadata on multiple images at once.
You can view and set this data using the Asset toolbar or in the Asset management page.
Asset toolbar
You can set tags and metadata for several selected assets at once from the Media Library using the Tag or Edit Structured Metadata options in the asset toolbar. You can Edit Contextual Metadata via the (3-dot) options menu. The type of metadata available for editing (contextual or structured) depends on the setup for your organization's account.
Asset management page
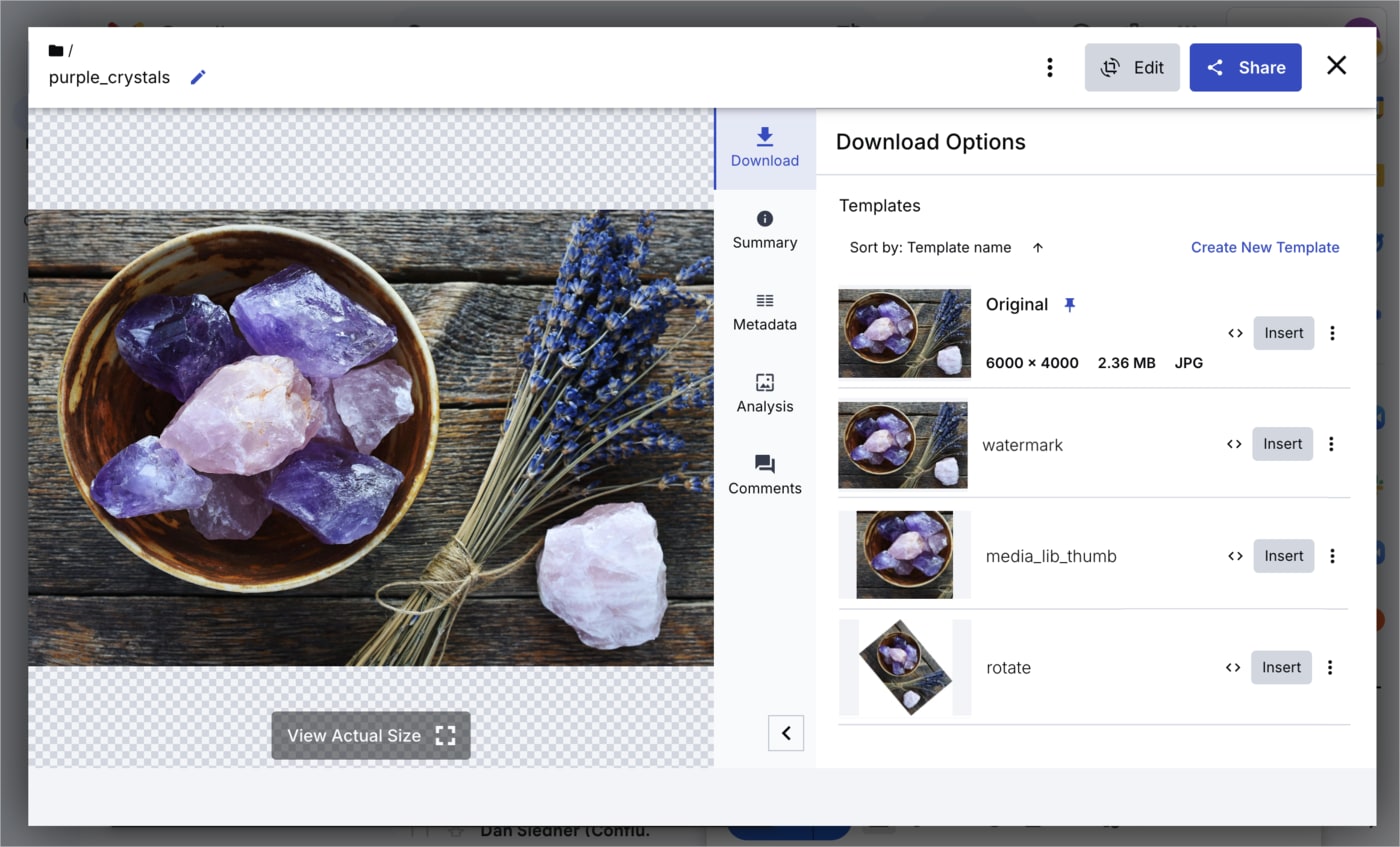
You can view or edit tags and metadata as well as view embedded image metadata for a specific asset from the Summary and Metadata tabs of the Asset management page.
To open the Asset management page either double-click the asset or select Open from the asset's context (right-click) menu.
Cloudinary Professional Services configuration support
The Adobe Creative Cloud Connector is part of Cloudinary's Standard Professional Services integration configuration package.
If you need assistance setting up this integration and you're on an Enterprise plan with a professional services package in your contract, Cloudinary's professional services can help you set it up as part of your contracted package.
Learn more: Cloudinary Professional Services integration configuration

